

This tutorial explains you how you can make new back-ups with The Neighborhood handler. Back-ups cannot be played directly in The Sims, but the biggest advantages are that they can be password protected and that they won't be deleted in the case you uninstall The Sims. Follow the steps below to get the hang of it.
Note that this tutorial uses quite many images. Please be patient while your browser is loading these images if you've viewing this online.
| Step 1: Opening the Back-up screen |
|---|
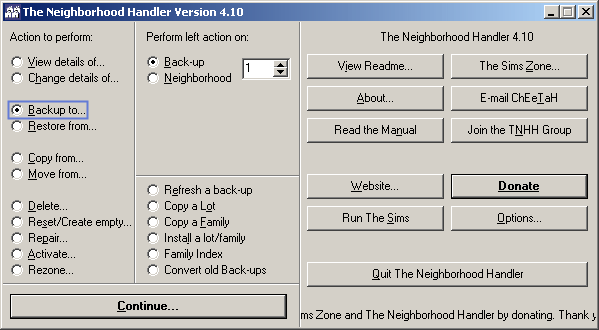
When you launch The Neighborhood Handler, you will see the main screen. This gives you access to all the options in The Neighborhood Handler. We want to create a back-up, so let's first select that option:
Now we have to select a slot to create the back-up on. Let's go for back-up 1, which is still empty because the "Quick info" box doesn't show up:
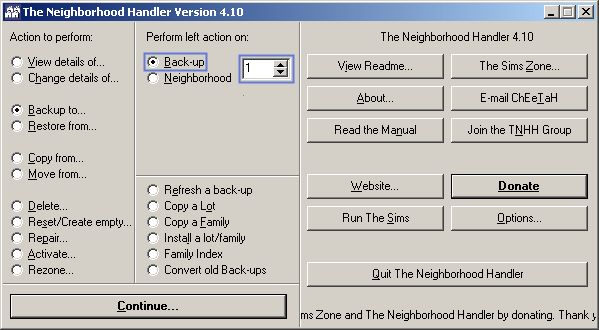
Now click the "Continue..." button at the bottom:
| Step 2: The Back-up screen |
|---|
Now we've entered the back-up screen. The first thing to do is to select the neighborhood to copy from. You cannot do this if you do not have any expansion packs installed, so then you can skip this step. Let's assume we want to create a back-up of neighborhood 1:
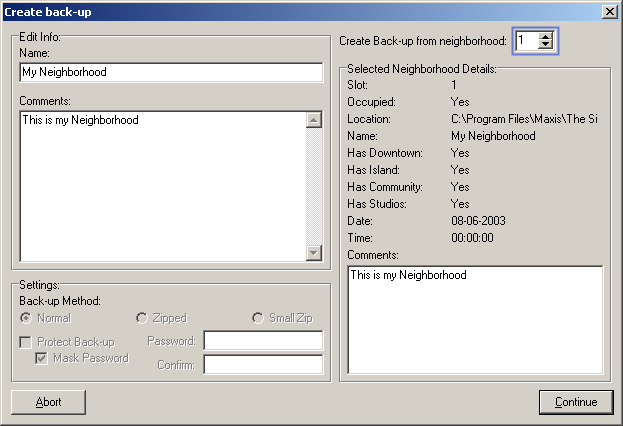
As you can see, the details of the neighborhood are shown in the box on the right. Because we didn't change the name or comments for the back-up yet on the left, it has copied those from the neighborhood's details. However, we want to change this, so that's what we do next. You can type anything you like:
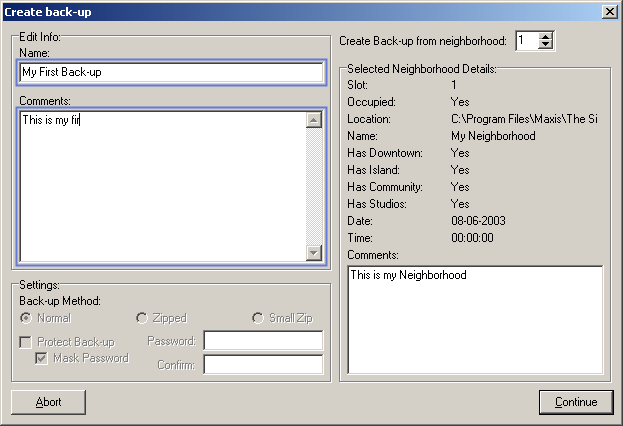
Now we've entered all the details, we are ready to go. All that's left to do now, is clicking the Continue button:

| Step 3: Waiting |
|---|
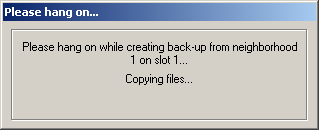
Now it's just a matter of waiting while the program makes the back-up:
| Step 4: Done |
|---|
After a while, the back-up has been made. You are taken back to the main screen, where that fact is being confirmed:
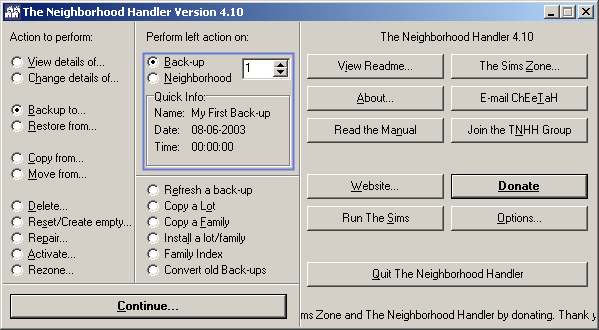
That's all there is. We have our back-up, with the details we gave it. It wasn't that hard, was it?
| Extra Notes |
|---|
This tutorial does not involve any protecting of the back-up.
Please refer to the manual for information about back-up protection.
The following chapters are important:
The back-up in this tutorial is created on an empty slot. If a slot is occupied, you will be asked to overwrite it once you click the "Continue" button on the back-up screen (Step 2). Additionally, if the existing back-up is protected, then you will be asked for the password of the back-up first.