

This tutorial describes how you can get up to 99 neighborhoods without any of the expansion packs for The Sims. The Sims 1.0 allows only 1 neighborhood by itself, but The Neighborhood Handler is able to give you more. You cannot load a different neighborhood from within The Sims, but instead you have to switch through The Neighborhood Handler. This cannot be changed, unfortunately. For this tutorial you must have gone through the Creating Back-ups tutorial (Tutorial 1) and the Restoring Back-ups tutorial (Tutorial 2). Follow the steps below to find out how to get those 99 neighborhoods.
Note that this tutorial uses quite many images. Please be patient while your browser is loading these images if you've viewing this online.
| Step 1: Creating back-ups |
|---|
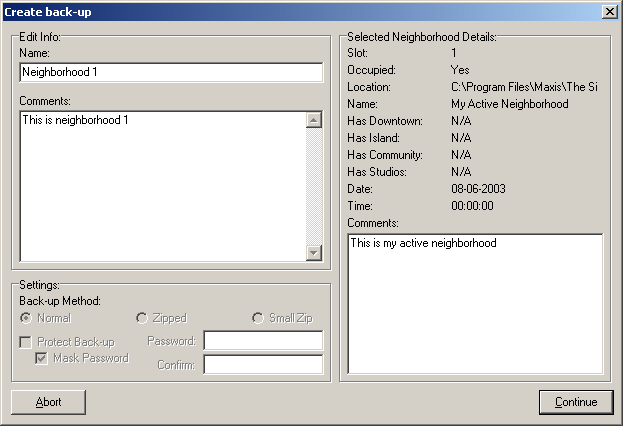
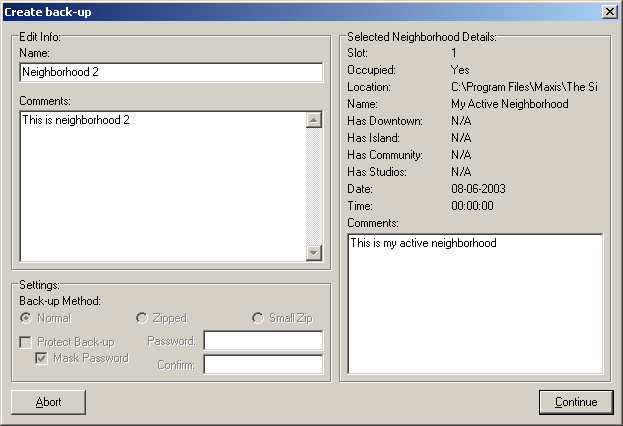
The first that has to be done is making back-ups. In this tutorial we create only two to illustrate the point, but you can make as many as you want (up to 99). This is explained in the Creating Back-ups tutorial (Tutorial 1). Please read that for more information. As said: we make 2 back-ups. One we call 'Neighborhood 1', the other one is called 'Neighborhood 2':
| Step 2: Restoring back-up |
|---|
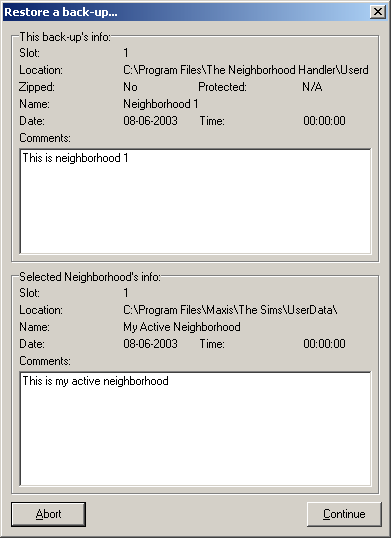
We now have created all the necessary back-ups. They're all the same yet but that doesn't matter. Currently, the last made back-up is 'active'. Basically that means that the neighborhood is currently associated with that back-up ('Neighborhood 2') in this case. Instead, we want to make 'Neighborhood 1' the active one. That's the one we want to play now. For that, we have to restore it first, as described in the Restoring Back-ups tutorial (Tutorial 2):
| Step 3: Play The Sims |
|---|
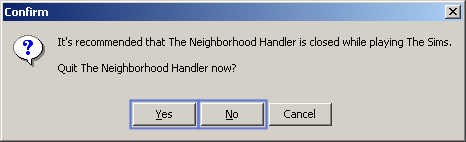
We now have loaded the back-up with the name 'Neighborhood 1' to The Sims. It's time to have fun. Play The Sims as much as you want. You can launch it from The Neighborhood Handler in just a few steps. To do that, click the "Run The Sims" button on the main screen:
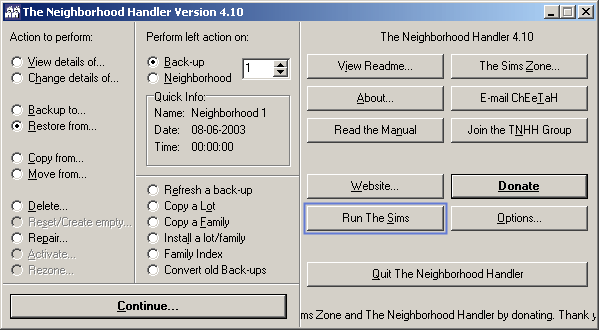
Choose if you want to close The Neighborhood Handler now. If you choose "Yes", then The Neighborhood Handler will close and you will have to restart it after you finished playing. Otherwise the program will remain open. It's recommended to close The Neighborhood Handler, especially on computer with less RAM memory. Keeping TNHH open while playing The Sims might slow down the game a bit, or even crash your system if you're low on system resources.
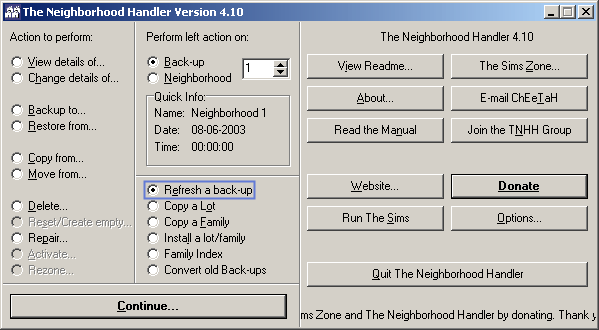
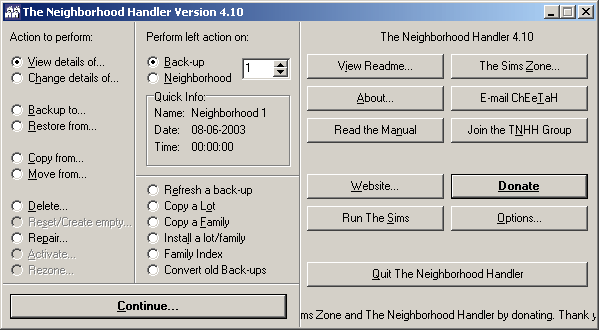
| Step 4: Opening the Refresh screen |
|---|
Had fun playing? Now it's time to update the back-up, so any changes are saved. If you closed The Neighborhood Handler while playing, you must first restart that. Choose the "Refresh a back-up" option:
Click the "Continue..." button to open the next screen:
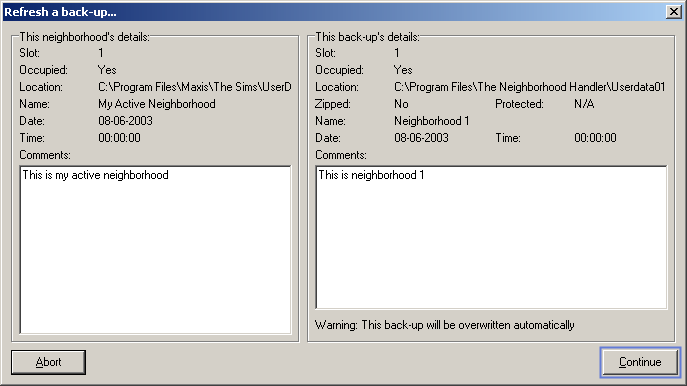
| Step 5: The Refresh a back-up screen |
|---|
You will see this screen pop up, where all that has to be done is clicking the "Continue" button:
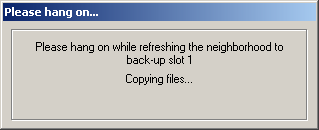
| Step 6: Waiting |
|---|
Now you have to wait until the back-up has been refreshed:
| Step 7: Done |
|---|
The back-up has now been refreshed:
This screenshot has been modified and shows a different date/time than normal, hence it may seem un-updated. That is not true, it will actually show updated dates and times.
Now if you want to play 'Neighborhood 2', simply repeat steps 2-6 for that back-up. If you made more back-ups, you can play those the same way. This way, you can have up to 99 neighborhoods to enjoy.
| Extra Notes |
|---|
Tip: Keep one copy of the empty neighborhood somewhere, for instance on back-up slot 99. You can use this to create more neighborhoods later. Use the "Copy from..." function to copy back-up 99 (or wherever you stored it) to any other back-up slot. Use that last slot as your new neighborhood. How to do that is explained in the Creating new Hoods 2 tutorial (Tutorial 5).
Tip: Do not create more neighborhoods than you intend to play. Every back-up you make takes up quite some hard drive space (about 10 Mb if you don't have any expansion packs installed, it can easily get up to 100 Mb with several expansion packs installed). If you (might) want to play more neighborhoods than you made at a later time, simply follow the previous tip. If you want to have many back-ups, it's recommended to use the "Small Zip" option when creating a back-up, which will decrease the size of a neighborhood a lot (about 5 to 15 Mb per back-up, depending on the amount of back-ups.
This tutorial is written mainly for those without expansion packs. You can use this if you have expansion packs installed, but it's less useful in that case.
This tutorial does not use protected back-ups. If you protect your back-ups, then you will be asked for the back-up's password after step 5 and before step 6.